4 Fun Art Projects Using Natural, Foraged Materials
Written by Sara Langer
Photography by Michelle Drewes
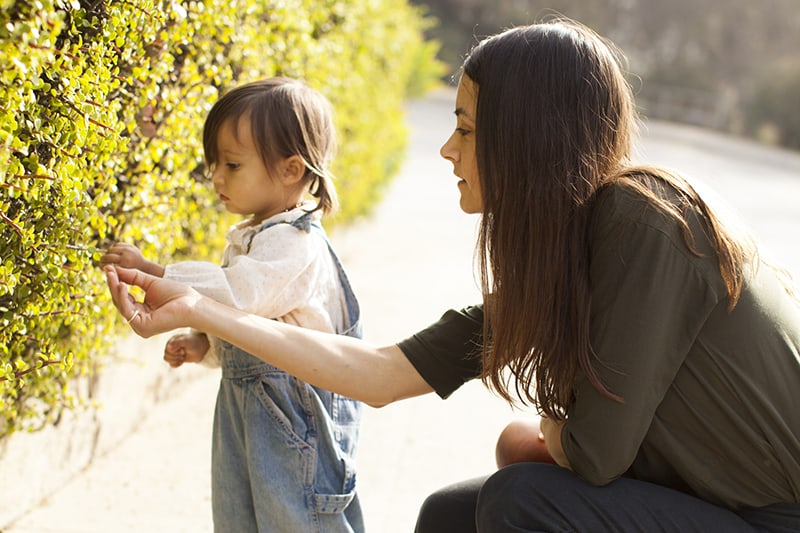
Spring is near, which means getting outside daily with your littles is going to become a (welcome) way of life. To keep the natural vibes going strong once you’re indoors—and no matter the season—we’ve compiled a list of four cool nature art projects that utilize foraged materials and are great for toddlers through grade-school kids. Ideal for lazy weekends and that spring break looming ahead, foraging for supplies will be half the fun! Check ’em out.
Nature Threading
Supplies: Any type of string/yarn/twine, yarn needle, collected leaves and petals, hole puncher (optional)
Directions: Allow your child some time to adventure outside and gather leaves and petals from various plants. Thread the yarn needle and gently push the needle through the middle of each leaf and petal. If you are doing this with a younger child, you may want to use a whole puncher so you or your child can punch holes in the leaves and petals for easier threading. They can make a crown or necklace. An alternative route is to tape your collected leaves up on the wall, which Erin Boyle showcased beautifully in this Mother profile. (Visual example of nature threading here.)
Yarn-Bombed Branches
Supplies: Yarn of various colors and textures (Tip: Thicker yarn will be easier for little hands), collected sticks or branches in a range of sizes, tape.
Directions: You can use any size branch for this project. The longer the branch, the more yarn (and longer attention span) required. Choose one color of yarn to start with and cut a piece that is about arm’s length (shorter is easier for younger children). Secure the yarn at one end of the branch, using a piece of tape or by tying a knot. Tightly wrap the yarn around the branch until you have just a few inches of yarn left. Tie the end of the yarn around the branch (or use another piece of tape to secure it). Choose a different color or texture of yarn and tie it just below the first color of yarn. Continue to wrap the yarn around the stick, alternating colors as often as you’d like, until you reach the end of the stick. (Visual examples here and here.)
Leaf Printing
Supplies: Paper, Waldorf crayons or crayons with the label peeled off, collected leaves in various shapes and sizes.
Directions: Collect several leaves of various shapes and sizes from different trees and plants (leaves should not be completely dried out as they will fall apart). Lay the paper directly over the leaf/leaves. You can choose to center the paper over one leaf or use multiple leaves to create a design on the paper. Using the full length of the crayon, pressed evenly on the paper, gently run the crayon across the paper to pick up the texture and veins of the leaves. Take it a step further with your older children and do a little research on the type of leaves collected and turn it into a leaf study/science activity. (Visual example here.)
Pet Rock
Supplies: Collected rocks, tempra paint, googly eyes, hot glue gun or a strong craft adhesive like E6000.
Directions: Rocks of any shape and texture will work, but finding a rock that has at least a 2-3 inch diameter (or bigger) and a smooth surface will make painting on features a little bit easier. Allow your child to paint the rock however they please either painting a face or simply decorating the rock with different colors. Allow the paint to dry before helping your child glue on the eyes. Voilà! You have the most low-maintenance “pet” ever. (Visual example—minus the googly eyes—here.)
Share this story