Make It: Milk Carton Crafts
Written by James Kicinski-McCoy
Photography by Photography by James Kicinski-McCoy
Got milk? Usually where there are kids, there is milk. Lots and lots of milk, which means lots and lots of empty milk cartons. We say: Recycle those bad boys by rinsing them out with hot soapy water, allow them to air dry, and use them for craft time! Need some ideas? We’ve got two super cute and easy to follow projects that the kids will love to make with a little help. So, drink up, kiddos! Milk is a key building block in a child’s diet and is beneficial for a better future. Each 8 oz. glass of milk contains 8 grams of protein and promotes strong and healthy bones. Plus, as our slideshow proves, you also get materials for fun things to make!
This post is in partnership with CA Milk.
-
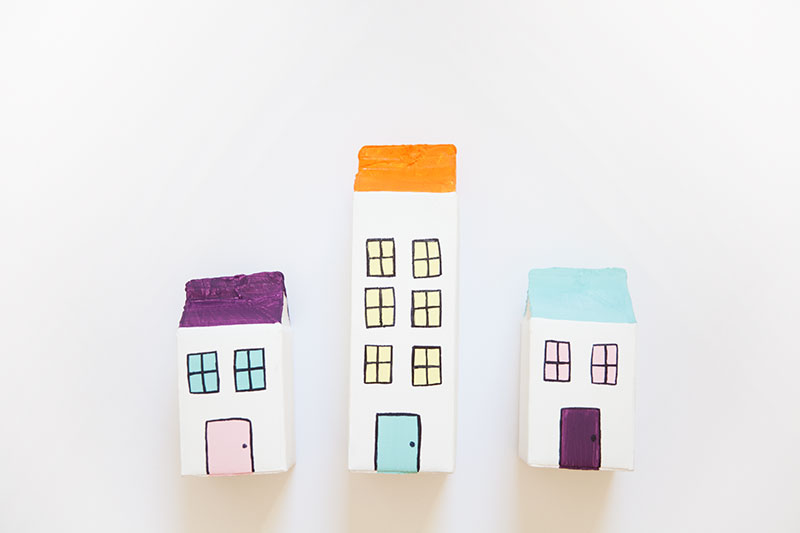
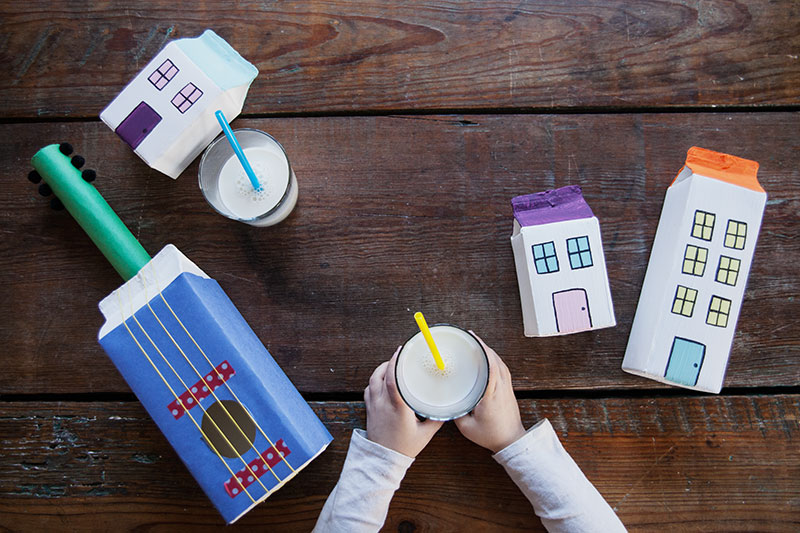
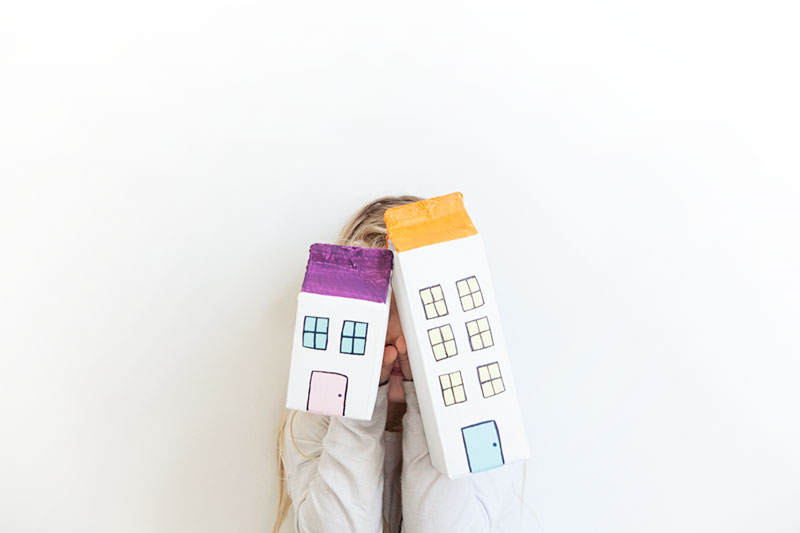
- A cute little village of milk carton houses for the kids to set up and play with for hours. Make as many houses as your little one's heart desires. The more milk, the merrier!
-
-
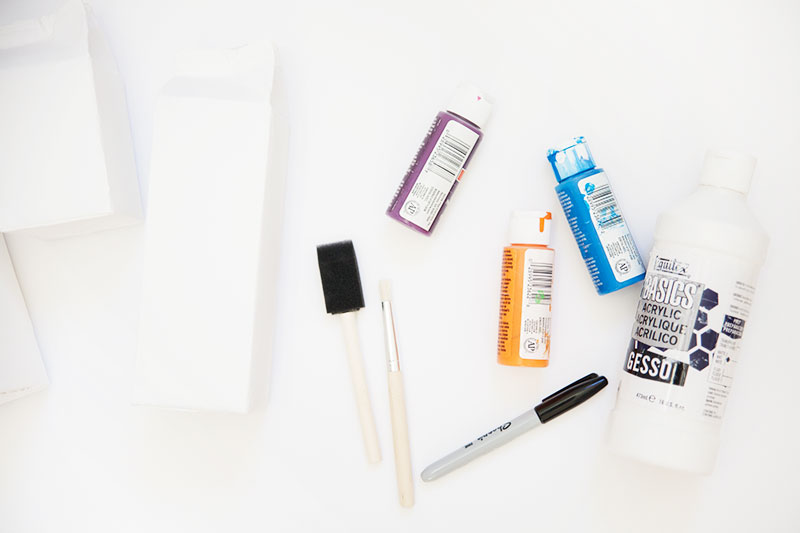
Empty milk cartons in various sizes
White Gesso
Paint in various colors
Hot glue gun
Sponge brushes or paint brushes
Sharpie marker
-
-
Step 1: Paint your empty milk cartons with white gesso (3-4 coats) and set to dry.
Step 2: Using a hot glue gun, glue the mouth of the carton shut.
Step 3: Paint windows, doors, and roof tops on each milk carton house and let dry.
Step 4: Outline each window and door with black Sharpie. Add details like doorknobs and window panes, if you'd like.
Project inspired by Brittni Mehlhoff.
-

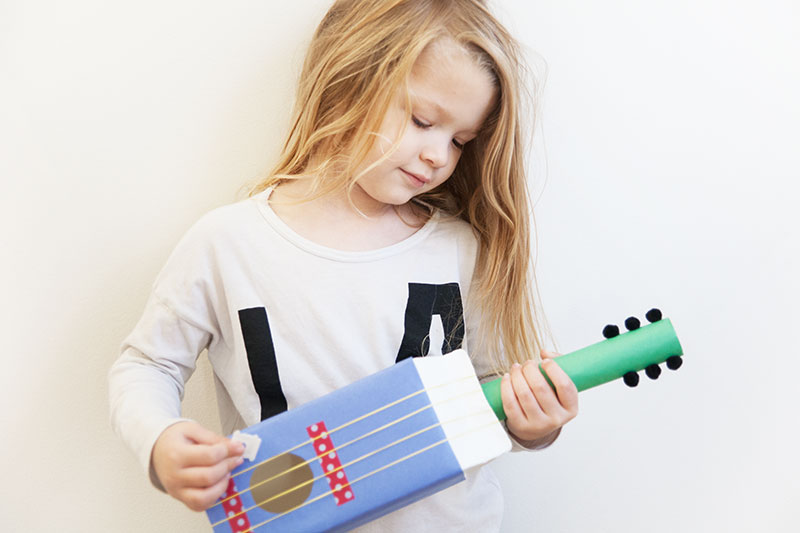
- Encourage music and loads of fun with this adorable milk carton guitar! The kids will be thrilled to play their new toy, using their bread clip pick. And you can pretty much guarantee a private concert from time to time!
-
-
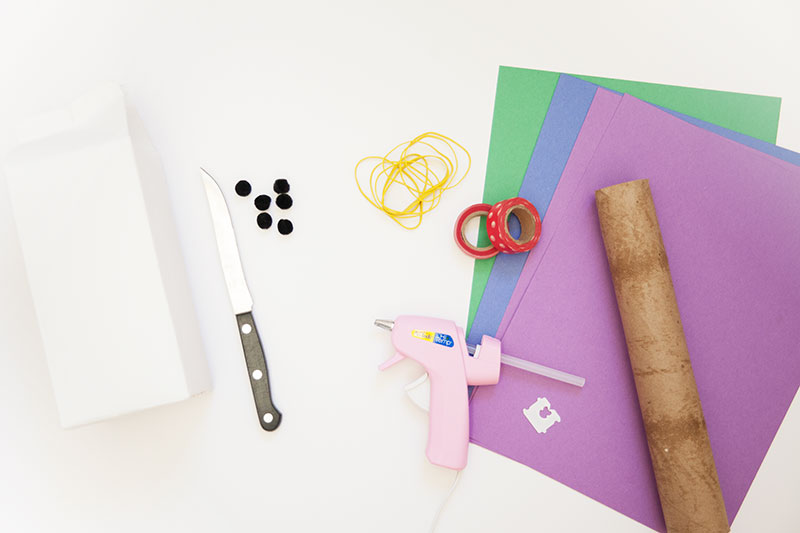
Empty milk carton
Paper towel roll
Sharp knife or scissors (adult supervision required)
Construction paper in a variety of colors
Rubber bands
Colored tape
Tiny pompoms
Hot glue gun
Bread clip
-
-
Step 1: Using hot glue, wrap the milk carton and the paper towel roll in colored construction paper.
Step 2: Cut a hole the size of the paper towel roll on the top of the milk carton. Keep it in place using hot glue.
Step 3: Cut a large hole on the face of the guitar.
Step 4: Place a piece of colored tape above and below the hole to create the "bridge."
Step 5: Wrap rubber bands around the carton to make "strings."
Step 6: Glue pompoms on each side of the "neck" to create "tuners."
Project inspired by Shana Faust.
Share this story