6 Independence-Building Montessori Activities For Toddlers
Written by SARA LANGER
Photography by Photographed by Sarah Hebenstreit
Whether or not your toddler attends preschool, there are plenty of skill-building activities you can put together at home. Super simple, Montessori-inspired options are a great place to start. You can put most of them together using items from around the house, and they’ll help build independence through lessons that focus on real life skills (what Montessori calls “Practical Life”). Below, we’re detailing six easy activities that will help your tot develop those fine motor skills that their little fingers are working so hard to perfect. In other words: Here’s the antidote to your next rainy April day.
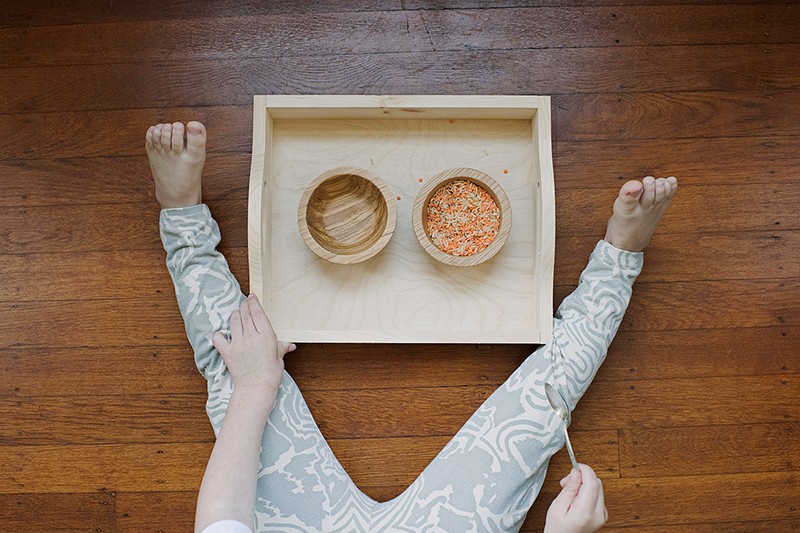
Spoon Transfer
Supplies:
Small tray or placemat
2 small bowls
1 spoon
Dry rice or lentils
Directions:
Place the bowls on the tray or placemat to define the area of space where your child will be working (a hallmark of Montessori activities). Demonstrate carefully spooning the rice or lentils completely from one bowl to the other. Make sure you show your child how to clean up the spills, as well!
Dry & Wet Pouring
Supplies:
Small tray or placemat
2 small glasses, with or without spouts
For dry pouring you can use dry rice or lentils
For wet pouring using colored water is best, so you child can see what they are pouring. You can use a drop of food coloring or throw an old washable marker into a bottle of water. It will color the water and using a washable marker with insure easy clean up.
Have a sponge handy for wet pouring
Directions:
Place the glasses on the tray or placemat. Demonstrate carefully pouring the rice, lentils, or water back and forth between the two glasses. Again, ,ake sure you show them how to clean up the spills (with the sponge for wet pouring), too!
Jars & Lids
Supplies:
Small basket
5-8 various containers with different types of lids
Directions:
Starting with all of the lids on the containers, demonstrate taking each lid off of each container and laying them on the table. Then, show your child how to put all of the lids back on the containers and return them to the basket. Finally, let them have at it themselves!
Cutting with Scissors
Supplies:
Small tray or placemat
Child-sized scissors
Strips of colored paper or any paper from your recycling bin will work
Small bowl
Directions:
Place all of the materials on the tray or mat. Demonstrate cutting the strips of paper into small pieces, holding the strip over the bowl to collect the cut pieces of paper. If you want to extend the activity, you can give your child a whole piece of paper and a glue stick for them to make a picture with the cut pieces of paper.
Setting the Table
Supplies:
Placemat
Napkin
Utensils (fork, knife, and/or spoon)
Plate
Cup or glass
Basket or container that can hold all the items listed above
Directions:
Start with all the items neatly placed in the basket or container. Demonstrate how to set a place at the table, starting with the placemat and carefully and thoughtfully placing the other items on the mat. You can do this right before mealtime in preparation to eat or you can show them how to put it away after a meal.
Flower Arranging
Supplies:
Small tray or placemat
Flowers of various colors, shapes, and sizes
Small vase
Small pitcher filled with water
Scissors
Sponge
Directions:
Place all of the materials on the tray or mat. Demonstrate carefully pouring water into the vase, cleaning up any spills with the sponge. Select a few flowers to put in the vase, using the scissors to cut the stems if needed. Let you child follow your example, creating a little centerpiece or several small arrangements.
Share this story