5 Art Projects Using Recycled Materials
Written by Sara Langer
Photography by Photographed by James Kicinski-McCoy
If you’re looking for few simple, inexpensive, and environmentally friendly activities to try at home with your kiddos, look no further than your recycling bin. With a few basic craft supplies and empty would-be-recycled containers, bottles, and paper, you have the inspiration for a myriad of craft projects. Using found and upcycled materials for artwork keeps the activity open-ended, allowing your child’s imagination to take flight. In order to get the creative juices flowing, we compiled a handful of fun and straightforward arts and crafts to lighten your recycling bin.
Cardboard Tube Binoculars
Supplies:
-2 cardboard toilet paper tubes
-40-inch piece of twine or yarn
-White craft glue
-Scissors
-Pen
Directions:
Use the pen to poke a hole in the top of the tube. Push the pen all the way through to the other side of the tube so you create 2 holes directly across from one another. Use the craft glue to glue the two tubes together, lining up the holes so you can string your twine through both tubes. Wrap the twine around the two tubes to secure them together while the glue dries. Once the glue dries unwrap the twine and string it through the holes and tying the ends together. Hang the binoculars around your neck and head out to explore.
Planet Earth Crayon Cups
Supplies:
-Broken up, old crayons. Preferably blue and green crayons.
-Muffin tin
Directions:
You can use any color of crayons, but if you combine green and blue crayons they will melt together to look like the earth’s land and water. Preheat the oven to 300 degrees. Break crayons up so they fit into the muffin tins and fill each one with about 1 inch of crayons. Place the muffin tin and “bake” the crayons for 20 mins, or until just melted. You don’t want to overcook the crayons as the wax will begin to smoke. Remove from oven and allow to cool. Transfer to the fridge for 15 minutes and the new giant crayons will pop right out of the pan.
Tin Can Succulent Garden
Supplies:
-Between 2 to 4 tin cans with the labels removed
-Potting soil (a mix specifically for succulents is ideal)
-1 to 2 handful of small rocks
-Succulents, between 1 to 2 per can, depending on size
Directions:
Because succulents don’t require much moisture, the soil needs to have good drainage so it doesn’t stay too damp. If you want to drill one to two small holes in the bottom of the can that will help the soil drain. You can skip this step and instead place a 1-inch layer of rocks at the bottom of the can before putting any soil in the can. Fill the can about half way with potting soil. Transfer the succulent plant into the can and gently scoop more potting soil around the plant until the can is full of soil and the plant is secure. Water occasionally, every 10 to 14 days depending on climate. You can use paint to decorate the cans beforehand, but we love the simplicity of the silver can.
Egg Carton Flower Mobile
Supplies:
-Egg carton
-Scissors
-Acrylic paint
-Paintbrushes
-Twine or string
-Large eye needle
-Twig or stick
Directions:
Cut or tear the egg carton, using the slots that hold each egg to create flowers of different shapes and sizes. You can cut petals by using the scissors to make slits. Paint each of the flowers and allow them to dry. Use the large eye needle (or have the adult help the child use the scissors) to poke a small hole in the middle of each flower. Cut 3 to 4 pieces of twine about 40 inches long. Thread the egg carton flowers onto the twine, tying a knot under each flower to allow it to hang, suspended on the twine, spacing them apart as you like. Tie each piece of twine on to the stick, spacing them evenly.
Milk Carton Guitar And/Or Milk Carton Village
Supplies For Guitar:
-1 empty milk carton
-Paper towel roll
-Sharp knife or scissors (adult supervision required)
-Construction paper in a variety of colors
-Rubber bands
-Colored tape
-Tiny pompoms
-Bread clip
Supplies For Village:
-Empty milk cartons in various sizes
-White gesso
-Paint in various colors
-Hot glue gun
-Sponge brushes or paint brushes
-Sharpie marker
Directions:
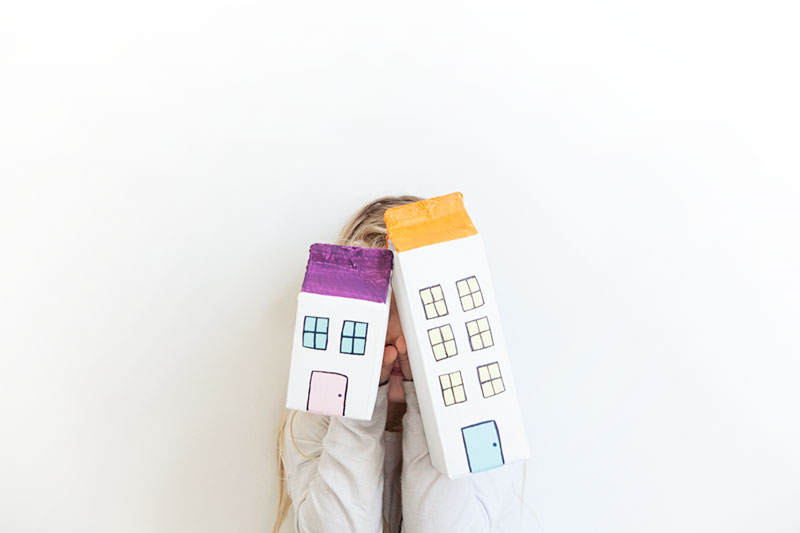
For the Milk Carton Guitar (originally seen here): Using hot glue, wrap the milk carton and the paper towel roll in colored construction paper. Cut a hole the size of the paper towel roll on the top of the milk carton. Keep it in place using hot glue. Cut a large hole on the face of the guitar. Place a piece of colored tape above and below the hole to create the “bridge.” Wrap rubber bands around the carton to make “strings.” Glue pompoms on each side of the “neck” to create “tuners.” For The Milk Carton Village: Paint the empty milk cartons with white gesso (3-4 coats) and set to dry. Once dry, use a hot glue to clue the mouths of the cartons shut. Then paint house details (windows, doors, rooftops, etc.). Once that paint has dried, add details and outlines with a black Sharpie.
For more kid-friendly activities, check out our pieces on 4 Waldorf-Inspired Art Activities, 4 Fun Art Projects Using Natural, Foraged Materials, plus 20+ Creative Ideas For Family Fun.
Share this story


